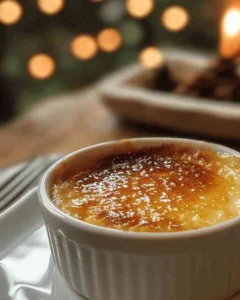
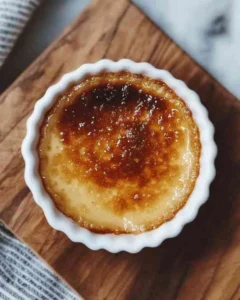
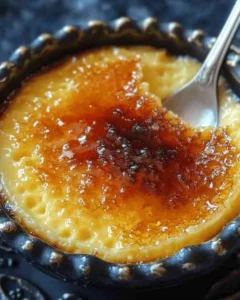
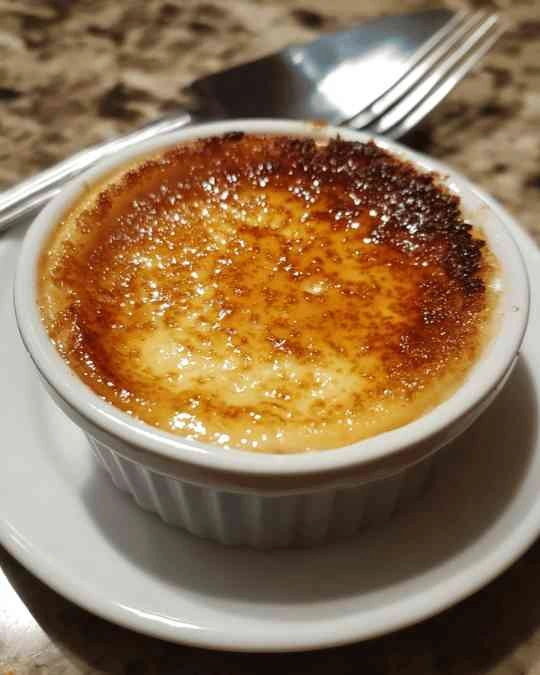
Caramelizing brulee is key to making crème brûlée, a classic French dessert. It’s called “burnt cream” and has been loved since 1691. Chef François Massialot first wrote its recipe.
To get that perfect crispy crust, you need top-notch ingredients. These include heavy cream, egg yolks, and sugar. This guide will show you how to make your crème brûlée a hit at any event.

Understanding Crème Brûlée and Its Elegance
Crème brûlée is a fancy dessert from France, created by François Massialot for Louis IX at Versailles. It has a creamy custard base and a caramelized sugar top. This makes it a symbol of luxury and indulgence.
Over time, crème brûlée became popular in Parisian restaurants in the 19th century. It’s a treat that has captured hearts and taste buds alike.
The dessert’s sweet and burnt sugar smell is irresistible. It’s called “krEHm broo-LAY” and served cold. The best size for it is a 6 to 8-ounce ramekin. It’s a favorite for its mix of flavors and textures.
Making crème brûlée at home is easy with the right steps. People love adding flavors like vanilla, chocolate, and fruits. Today, it’s a classic that inspires both home cooks and chefs to try new things.
Essential Ingredients for the Perfect Brulee
Mastering crème brûlée means knowing the right ingredients. This dessert needs a few key parts for its creamy texture and taste.
Heavy cream is the base of this dessert. Pastry chefs often mix whole milk and heavy cream for a rich texture. A 1:1 ratio of heavy cream to whole milk is best for the custard’s consistency. Full-fat ingredients make the custard silkier and more flavorful.
Egg yolks are crucial for thickening the custard and adding flavor. Recipes usually call for four egg yolks. Adding about 1/2 cup of granulated white sugar is important. It sweetens the custard and caramelizes for the topping.
Adding 1 teaspoon of pure vanilla extract gives the dessert a complex flavor. A pinch of 1/2 teaspoon of fine sea salt balances the sweetness. Each ingredient adds to the dessert’s taste and texture.
Baking in a water bath prevents overcooking and cracking. This method keeps the temperature steady, making the custards tender and velvety. They should be slightly jiggly when shaken.
Here’s a concise breakdown of the essential crème brûlée ingredients:
| Ingredient | Quantity | Purpose |
|---|---|---|
| Heavy Whipping Cream | 2 cups | Base for the custard, adds richness |
| Granulated Sugar | 1/2 cup (plus extra for topping) | Sweetens custard and caramelizes for topping |
| Egg Yolks | 4 | Thickens custard and adds flavor |
| Vanilla Extract | 1 teaspoon | Upgrades flavor |
| Fine Sea Salt | 1/2 teaspoon | Balances sweetness |
Using top-quality ingredients is key to making perfect crème brûlée. Spend time finding the best ingredients. Preparing the custards ahead of time helps the flavors blend well before serving.
Step-by-Step Guide to Making Crème Brûlée
Learning to make crème brûlée is rewarding. It lets you impress others with a fancy dessert. This crème brûlée recipe makes it easy, breaking it down into simple steps.
First, get the key ingredients:
- Egg yolks
- Sugar (granulated)
- Heavy cream
- Vanilla extract
Start by mixing egg yolks and sugar until it’s light and thick. Heat the cream and vanilla until it simmers, then stop. Slowly add the cream to the egg mix while whisking. This tempering technique keeps the eggs smooth.
Then, put the custard in ramekins or a dish. Bake it in a water bath at 325°F (160°C). The water bath cooks it gently. Check it’s set but still a bit jiggly.
Let it cool, then refrigerate for 2-3 hours or overnight. You can keep uncooked custard in the fridge for up to 5 days. Baked custards last 4 days before caramelizing the sugar.
When serving, torch the top just before. It’s best eaten within 20 minutes for a crispy top. If it softens, it’s still tasty, even if it doesn’t crack as much.
This guide helps you cook crème brûlée at home. It Secures a delicious result every time you make this crème brûlée recipe.
How to Caramelize Brulee?
Caramelizing crème brûlée needs the right techniques and tools for that crispy layer. Knowing how to do it is key to mastering the art. Follow these steps to get your dessert to shine with the perfect brulee crust.
Gathering Necessary Tools
You’ll need a few key tools to start. A crème brûlée torch is a top pick for precise caramelization. If you don’t have one, a broiler works too. Make sure you have heatproof ramekins and a good oven thermometer for accurate temperatures.
Preparing the Custard Base
Your custard base must be smooth and ready before caramelizing. Stick to your recipe and use top-notch ingredients. Imperial Sugar is known for its rich flavor. Knowing how to use a brulee torch Secures even caramelization, boosting your dessert’s taste.
Chilling for the Best Texture
Chilling the custard is key. Let it set in the fridge for at least two hours. This makes it firm, so it doesn’t overcook under high heat. A chilled brulee is easier to handle and gets that perfect crust when caramelized.
Choosing the Right Caramelization Method
Getting the perfect finish on your crème brûlée is key. Knowing the best ways to caramelize it can make a big difference. Each method adds its own flavor and look, letting you tailor your dessert to your liking.
The torch method is a top choice for many chefs. It uses a crème brûlée torch for precise caramelization. You’ll need about 1 teaspoon of sugar for a 6-ounce ramekin. Torch it with smooth motions for a crisp, caramelized top.
If you don’t have a torch, the broil method is a good backup. It involves broiling the crème brûlée for about four minutes. But, it might not be as even as torching, which could change your dessert’s look.
The Caramel Pour Method uses sugar syrup poured over the custard. It needs quick action since caramel hardens fast. Aim for a thin sugar layer for even caramelization, and be ready to practice to get it right.
Each caramelization method has its pros and cons. Your choice depends on your kitchen tools and comfort level. Knowing these options helps you pick the best method for your dessert.
Best Brulee Caramelization Methods: Torch vs. Oven
There are different ways to get that perfect caramelized crust for your crème brûlée. You can use a crème brûlée torch or the oven broiler. Each method has its own benefits, so it’s good to know about them.
Using a Crème Brûlée Torch Effectively
When using a crème brûlée torch, move the flame over the sugar to get even caramelization. Hold the torch about 2 inches away to avoid burning. Watch for a light golden color and a sweet smell to know it’s done.
Before caramelizing, sprinkle 1/2 to 1 teaspoon of granulated sugar on each custard. This will give you a delicate crunch. With practice, you can get that glass-like crust in about 5 minutes.
Caramelizing Using the Broiler Technique
If you prefer the broiler method, it’s a good alternative. Preheat the broiler and put the custard-filled ramekins on the top rack. This method needs careful watching because uneven heat can cause color issues.
To avoid breaking the glassware, let the ramekins come to room temperature first. Keep the broiler at a safe distance to Secure even caramelization without overcooking the custard.

Brulee Caramelization Techniques
Mastering brulee techniques is key to getting that perfect crunchy shell on your dessert. Caramelizing sugar for desserts, like crème brûlée, depends on the right sugar and careful prep. White granulated sugar is the best choice because it melts evenly, creating a glass-like finish.
The sugar’s grain size is also important. It helps in even caramelization, making your dessert’s texture uniform.
To get the best results, spread the sugar about 1/8 inch thick over the custard. This thickness Secures even caramelization without overpowering the custard. When heating, it’s important to apply heat evenly. A kitchen torch is a good choice because it lets you control the caramelization precisely.
Sugar caramelizes between 320°F (160°C) and 356°F (180°C). Keeping an eye on the temperature is crucial. This way, the sugar turns into a crunchy texture without burning.
After making your crème brûlée, store it covered in plastic wrap in the fridge for up to three days. This keeps the custard fresh until you’re ready to caramelize the top.
Using these brulee techniques improves your caramelization skills. This way, you can serve a crème brûlée that wows with its texture and taste.
Caramelizing Brulee Tips for Success
Getting the perfect caramelized brulee takes focus and knowing common mistakes. Follow these tips to get that glass-like finish on top. It makes your dessert even more special.
Avoiding Common Mistakes
Many people struggle with caramelizing brulee. Here are some tips to help you avoid common mistakes:
- Uneven Heating: Move your kitchen torch flame evenly. This prevents burning some spots and leaving others raw.
- Wrong Sugar Selection: Use granulated sugar for caramelizing. Powdered sugar can clump and burn easily.
- Under or Over Caramelizing: Aim for a golden-brown color. Watch the sugar closely as it melts, adjusting as needed.
- Lack of Patience: Rushing can ruin the texture. Let the sugar caramelize slowly for the best results.
Adjusting Sugar for Different Textures
Changing the sugar in brulee lets you customize the crust’s texture. It adds complexity to your dessert:
- Granulated Sugar: This choice gives a clean, crackly crust.
- Brown Sugar: Light or dark brown sugar adds caramel flavor and a chewier texture.
- Powdered Sugar: It’s less common but can make a softer crust. But, watch it closely to avoid burning.
Playing with sugar amounts changes sweetness and texture. It lets you make a brulee that’s just right for you. For the best results, control the temperature and practice your technique.

Achieving Brulee Crustiness with Precision
To get that perfect crunch on your crème brûlée, pay attention to a few important things. The right mix of sugar and heat is key. Using white and brown sugar not only adds flavor but also helps with the crust’s texture.
When making the sugar crust, how you caramelize it matters a lot. If you’re using a torch, control the flame well. Make sure to cover evenly to avoid burning. Hold your torch at the right angle and move it to get a smooth caramel layer.
On the other hand, using an oven broiler needs careful placement of the ramekins. Being too close can cause uneven cooking and burning. A 2-4 minute broil usually gives a nice golden crust.
- Even Distribution: Spread sugar evenly on the custard to Secure consistent melting.
- Layer Thickness: A thin sugar layer caramelizes faster, creating the perfect crunch.
- Cooling Time: Let the dish rest after caramelizing to let the sugar settle.
Getting the perfect crust takes patience. Try out the techniques mentioned and enjoy the process of learning. With each try, you’ll get closer to mastering the art of crème brûlée.
Conclusion
Mastering caramelizing crème brûlée is all about balance. It needs the right ingredients and techniques. A perfect crème brûlée has 5 large egg yolks, 1/2 cup granulated sugar, and 2 cups heavy cream. You can use a vanilla bean or pure vanilla extract for flavor.
Using Turbinado sugar makes the top crispy and delicious. Your choice of tool, like a hand-held torch or oven broiler, affects the result. This article showed you different ways to caramelize, step by step.
Practicing these methods will help you find what works best. You’ll impress your guests with this elegant dessert. The journey to making the perfect crème brûlée is fun and rewarding.
The tips in this article are a great start for your caramelization adventures. With each try, you’ll get closer to making this classic dish just right. Enjoy experimenting and savoring your homemade creations!
FAQs on Caramelizing Crème Brûlée and Sugar
How to caramelize crème brûlée?
To caramelize crème brûlée:
- Prepare the custard base: Secure your crème brûlée custard is chilled and set in ramekins.
- Sprinkle sugar evenly: Add a thin, even layer of granulated sugar on top of the custard.
- Use a blowtorch: Hold a kitchen blowtorch about 2-3 inches away and move it in a circular motion over the sugar until it melts, bubbles, and turns golden brown.
- Let it set: Allow the caramelized sugar to cool for 1-2 minutes before serving to form a crisp layer.
How to caramelize crème brûlée without a blowtorch?
If you don’t have a blowtorch, you can use your oven’s broiler:
- Preheat the broiler: Set your oven to the highest broiler setting.
- Prepare the custard: Sprinkle an even layer of sugar over the custard in the ramekins.
- Place ramekins under the broiler: Put the ramekins on a baking sheet and place them about 6 inches below the broiler.
- Watch closely: Broil for 1-3 minutes, keeping a close eye to prevent burning. Rotate the baking sheet if needed for even caramelization.
- Cool briefly: Let the ramekins sit for a minute to allow the sugar to harden before serving.
How to caramelize sugar in ramekins?
To caramelize sugar directly in ramekins:
- Heat sugar: Place a small amount of granulated sugar (about 2-3 tablespoons) in a clean, dry ramekin.
- Melt on stovetop or with a blowtorch:
- Stovetop method: Hold the ramekin carefully over a low flame and swirl gently until the sugar melts and turns golden.
- Blowtorch method: Use a blowtorch to heat the sugar directly in the ramekin until it caramelizes.
- Cool slightly: Let the caramelized sugar set before using it as a topping or serving.
What is the best way to caramelize sugar?
The best way to caramelize sugar depends on the application:
- Dry method:
- Heat sugar in a clean, dry pan over medium heat, stirring gently as it melts.
- This method is quicker and results in a more intense caramel flavor.
- Wet method:
- Combine sugar and a small amount of water in a pan.
- Heat over medium-low heat without stirring until the sugar dissolves and caramelizes.
- This method gives you more control and reduces the risk of burning.
- Blowtorch method:
- Sprinkle sugar over a dessert (like crème brûlée) and caramelize it with a blowtorch for a crispy, golden finish.
- Broiler method:
- Use an oven broiler to caramelize sugar evenly on top of dishes when a blowtorch isn’t available.
Each method provides a unique texture and flavor, so choose one based on your needs and tools available.

